Choosing the Right Tent

The right tent can make all the difference on a trip. With many different styles of tents and modes of travel to consider before making a purchase. Choosing the wrong tent can be an expensive mistake, and make your camping experience memorable for all the wrong reasons. If you are new to all of this, or just buying a tent for the first time, these are some of the most important questions you will want to consider before you spend your hard earned cash.
How are you getting to camp?
Or what activity are you planning?
If it’s human powered then you’re walking/biking/climbing/etc. there. You’ll want a lightweight and compact backpacking tent since you will be carrying it and everything else you need to live. Ideally it should weigh about 2 pounds per person and fit inside a pack. Lightweight is GREAT. Groups can carry larger multiple person tents by splitting the load (and perhaps the cost) between people. Distributing the weight equally between packs and rotating the duty of carrying the heaviest components makes for a better trip. Another super lightweight option you may want to consider is a hammock, we’ll go over those later.
If you’re using a motor vehicle then you’re rolling up to the campsite and unloading from your car/UTE/motorcycle/etc… There is a temptation to throw caution to the wind and get the biggest tent you can fit in your vehicle. Don’t do this without considering how long your stay is going to be. If you plan on setting up a base camp from which you’ll be exploring from over the next few days then a tent with an emphasis on livable space and comfort makes sense. If you like overland style trips and move camp every day then do you really want to spend the time and effort setting up your ultra mega tent just to pack it away every morning?
When and where are you going?
The time of year, climate, and altitude at your destination are important considerations. You’ll see two basic types of ratings, 3-season and 4-season tents. A 3-season tent is best for mild conditions: spring, summer, and fall. They’re not suitable for winter camping. They are almost always “double-walled” tents. A 4-season tent is somewhat misleading. The construction that makes them ideal for winter camping tends to make them miserable in milder seasons as they are most often single-walled tents with less breathability. Most importantly, you should always pick a tent with the expectation of seasonal bad weather.
Single Walled Tents
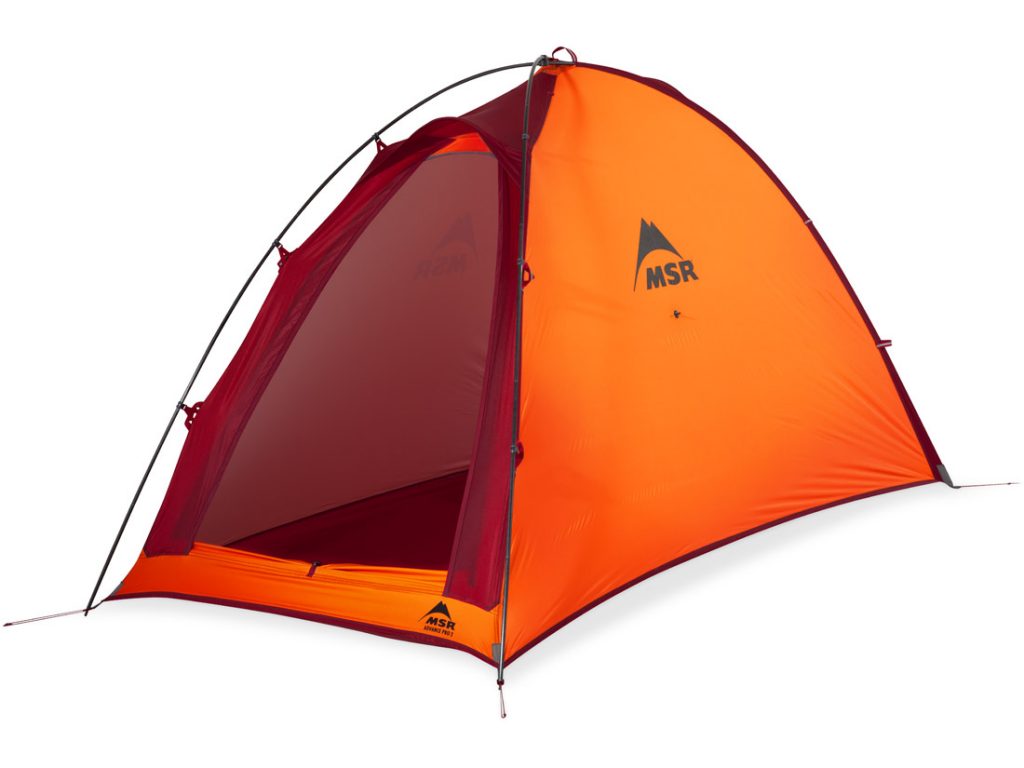
MSR Advance Pro 2 Person Single wall Tent
Single-walled tents offer weather protection in the tent body via a single waterproof, but not breathable, shell. This makes them better at heat retention. Single wall tents are also much more resilient against high winds because of the solid fabric wall to the ground without a rainfly to catch the wind. The lack of a second shell also makes them lighter and faster to set up when compared to a comparable sized double-walled tent. In a winter/alpine environment where the weather can get bad fast, a quick setup is really crucial.
Drawbacks for single-walled tents:
- The way the tent is constructed means condensation is a possible issue.
- As mentioned previously they can be miserable in milder / humid seasons.
Double Walled Tents
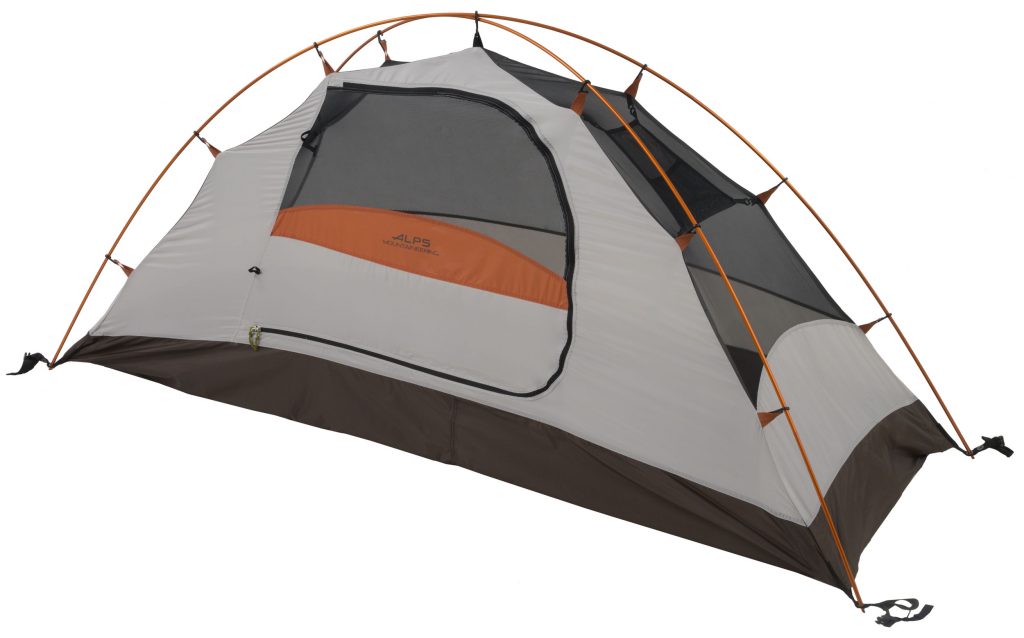
ALPS Mountaineering Lynx 1 person inner shell of a double walled tent
ALPS Mountaineering Lynx 1 person outer shell of a double walled tent
Double-walled tents consist of the tent body, which includes the floor and walls that are often a mesh, and the rainfly which covers the tent body and offers protection from the wind and rain. This construction of an external waterproof but not breathable cover with a breathable but not waterproof inner shell offers better ventilation and has less issues with condensation. There are some drawbacks.
- They don’t retain heat or resist wind as well as single-walled tents.
- They require more staking and attention to guying out the rainfly.
- Rainfly fabrics, particularly nylons, can stretch a little when exposed to moisture and require re-tensioning of the rainfly.
- They are typically heavier due to more materials/parts.
What type of ground will you be camping on?
Tent stakes are not all the same. You’ll need different stakes depending on the soil conditions. You do not want to have to pound in a two foot long, broad tent stake designed for sand into the rocky ground. Likewise, a stake designed for rocky soil will not do anything for you in sand. The goal here isn’t to overwhelm you with every type of tent stake there is. I won’t be listing all the different types. The goal is just to make you aware that they exist and perhaps carrying different types will be necessary.
Tent Footprints
Tent footprints protect your tent. Specifically the tent floor by preventing the wear and tear of your tent against the ground. Instead they take the abuse. They are often sold separately from the tent. You need to check if one is included if you want one.
They are also two distinct types of tent footprints. The type most typically found are a solid material and act as a barrier to ground moisture for the tent. But under the right (wrong?) conditions you can end up with water pooling on top of the footprint under your tent. Because of this some give the advice that a footprint is not necessary. That since most tents have waterproof floors a waterproof footprint is redundant. Take note though that if you choose to forgo the purchase of a footprint you’ll need to avoid placing your tent on top of anything that can damage it. Another type is a mesh material. This allows moisture (and debris like sand) to pass through and prevents pooling of water between the tent and footprint. You retain the ground protection and avoid the potential for water pooling between the footprint and tent.
Whether you choose a solid or mesh footprint, it’s always best to get into the habit of picking a campsite with good drainage and avoid areas where water will flow and pool.
What am I going to do if the weather gets bad?
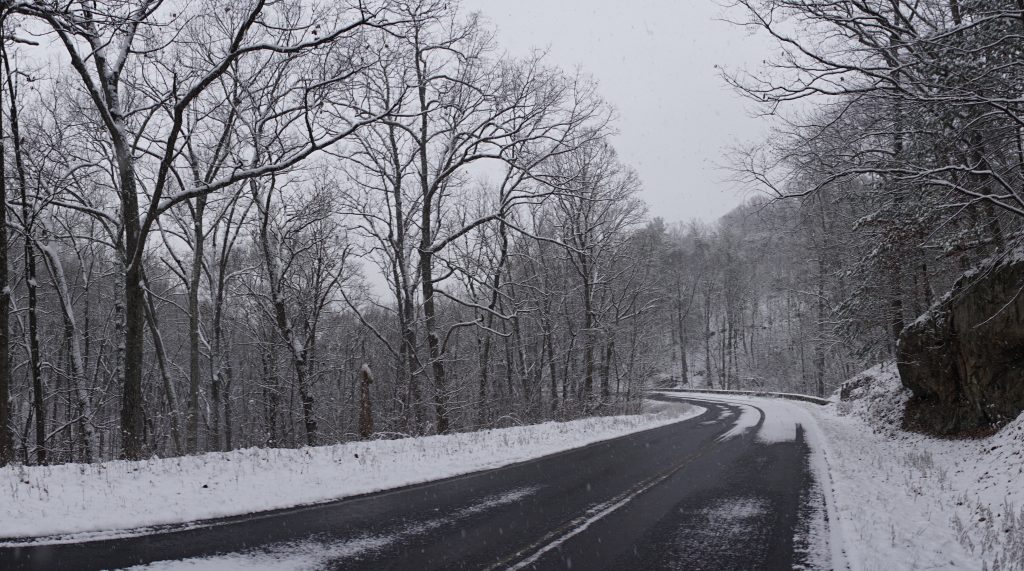
Shenandoah National Park surprise March snowstorm
An important note that can not be emphasized enough is that you need to educate yourself about the environment you will be camping in, and exposing yourself to. Get weather forecasts and anticipate dramatic changes in the weather. Choose equipment appropriate for the conditions and altitude. There’s a BIG difference between camping in the woods at sea level versus 4,000 feet elevation. The right gear can make the difference between being mildly inconvenienced, or becoming a participant in a rescue operation over the weekend. Despite the weather forecast, always ask yourself and have an answer for this question: What am I going to do if the weather gets bad?
Okay. I get it. But what if it just rains?
Most tents made today use polyester fabric that, by itself, is not waterproof. To resist water penetration one or more polyurethane coatings are applied. This resistance to water penetration is measured by how high a column of water in millimeters (mm) can be held up against the fabric for one minute before a single drop of water seeps through and begins to form. There is a caveat here. No international standard defines a tent fabric as waterproof. Generally 1500mm is widely accepted as a minimum and able to withstand almost all rain conditions. A rainfly rated at 1500mm means that a 1500mm, almost 5 feet, column of water will take at least 1 minute before water penetrates the fabric and a drop begins to form.
The floors or groundsheets of tents are often a heavier material. They take the most abuse. Polyester and Nylon floors should have a higher mm rating than the tent walls ranging from 1500mm to 10,000mm. Optionally they can also be made from a waterproof and non-breathable material such as polyethylene or heavy duty PVC. Most tents today also have bathtub floors. This is a type of floor design where the floor material extents up the sidewall of the tent a short distance forming a tub. This minimizes the chance of water entering into the tent.
Some tents will have storm flaps and skirts. These extend from the side of the tent at the base. They direct water out and away helping to keep water out from under the tent.
Something to make note here is that unless the tent is made entirely from a non-breathable material your tent will leak given a long enough exposure to water.
How many are going?
Use the number of people a tent is rated for as a guide but pay attention to the floor space and peak height. Are you bringing your dog(s)? Don’t forget them during your selection process. Keep in mind that the rating is sort of a maximum occupancy under normal conditions. Two people in a two person tent will mean you’ll most likely be spooning with your camp buddy when you bring in all your gear to escape the rain.
In general you’ll want to at least +1 the number of people when selecting a tent. Lay out your gear and sleeping bags on the floor to know how much floor space you’ll need. If that’s not an option you can still guesstimate how much of your gear will count as an extra person.
Make yourself comfortable
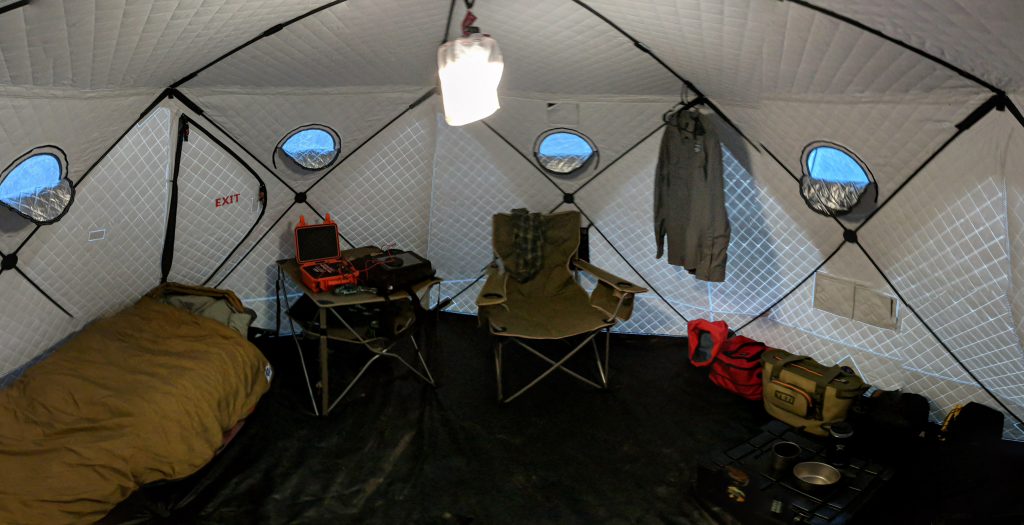
A panoramic of the interior of the SHIFTPOD2 by Advanced Shelter Systems, Inc.
The peak height is the distance between the floor and its highest point. This is an important number to pay attention to in regards to livability. Depending on your height it denotes whether or not you’ll be able to sit up, crouch, or stand inside your tent. If your plan is to set up a base camp you’ll want to be able to stand in your tent. The Shiftpod pictured above is a great example of an overland style tent. Plenty of peak height with room for everything and everyone.
Keep in mind that extra space comes with a cost to portability. This isn’t as much of a concern if you are getting to your camp via 4WD vehicle. However if it’s you expending the energy to haul that extra space around on your back you should try to select something lightweight and compact and deal with a smaller tent.
What else is there to consider?
More on tent construction
Vestibules are a nice feature that we look for in a ground tent. This space does not cost much in terms of portability or weight of the tent and is extremely useful for storing gear, and providing a space for wet/dirty boots and gear.
Freestanding tents are not required to be staked to the ground as the tent structure supports itself. Generally heavier than non-freestanding tents, they are more popular. They can be moved easily if you discover you’ve placed your tent on an uncomfortable spot and they come with a bunch of nice features. They are dependent on the poles that come with the tent though. Consider carrying a repair kit for your tent poles.
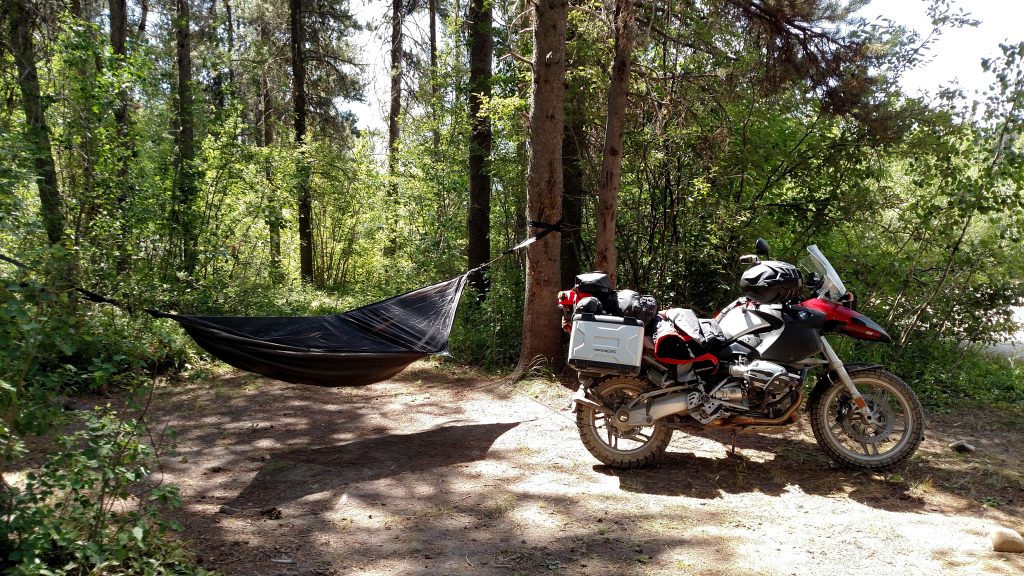
Non-freestanding tents are required to be staked to the ground. Even with the higher learning curve they can be faster to set up when compared to a comparable sized freestanding tent. Non-freestanding tents either totally forgo tent poles, significantly pare down their tent poles, or allow you to improvise tent poles by using trekking poles, trees etc. This is why hammocks were mentioned previously. Some of them also double as non-freestanding tents. Hennessy Hammock is an example of such providing a tutorial to set up on the ground. If you want as light a pack as possible, but still require a shelter, then you should look into non-freestanding tents.
Consider a backup
Hammocks can make good backups for your tent in mild weather and a easy alternative for short stays. This gives you the option of leaving the ultra-mega tent in your vehicle or at home.
Additional Resources
- TentPole Technologies can repair damaged poles and create custom pole replacements. A much better alternative than buying a new tent should you break a pole.
- Nemo Equipment offers advice on how to store your gear.
- REI provides great information to help you keep your tent for years.
MSR has excellent articles going into much detail about fabrics and waterproof ratings.
Full Disclosure: This article was originally published on American Adventurist. Some additional edits from the author were made to accommodate this site’s format.
#Educate, #Equip, #Explore
Tread Lightly. It’s more than protecting the environment.
Tread LightlyTread lightly is more than protecting the environment. “Respect the Rights of Others” includes considering the safety of others as well. “Educate Yourself” goes beyond the scope of etiquette and laws governing environmental impact.
Are you familiar with the term “trundling”? I wasn’t but some recent events have brought that term to my attention. It is a term in the context of mountaineering and refers to the practice of rolling rocks or boulders down hillsides or over cliffs. A climber may trundle to make a route safer but there’s a long list of conditions that must be met. If you are not a climber and/or are not familiar with the required conditions then you have absolutely no justification to do it. Even so it is illegal in a lot of areas because it’s extremely dangerous and has killed people.
August, 11 2007 – NOLS Director Killed by Trundled Rock.
“On Saturday, August 11, Peter Absolon (47) was killed instantly when a falling rock struck him from approximately 300 feet above while climbing a new route in Leg Lake Cirque, southern Wind River Range, Wyoming. Phil Powers, Absolon’s friend and Executive Director of the American Alpine Club (AAC), declared that the rock was trundled purposefully by a hiker, who had no Tread Lightlyknowledge of the climbers below.”
“… the hikers had no idea climbers were below them and were deeply anguished by the news of Absolon’s death.”
I can’t imagine being one of those hikers. They may have been very familiar with the trail. Had never seen a climber in that section. Thought “what are the odds…” or “it could never happen…”. If I were to wear their shoes, even if I had done everything I thought possible to educate myself the realization that my action was the cause could destroy any passion I had for the outdoors.
Tread Lightly and understand that the consequences of your actions can go beyond your education and experience.
Snorkel Air Rams and their Proper Facing
Spend anytime at an event involving OHVs and you’ll see them. A raised air intake to allow the vehicle to cross deep water without water ingress into the engine and moving the air intake up and away from the dust. A snorkel. And beyond that short introduction this article is not about what snorkels are and if one is right for you. This article address a specific feature on vehicle snorkels. The air ram head.
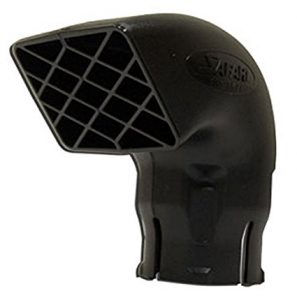
The air ram head is the point of entry for air into some types of snorkel systems and the merits of which way to face the air ram head is discussed at events and on forums alike. Forward or backwards. Which way is best. And with varying opinions on both I decided to get a definitive answer. I decided to just ask the guys who make them.
Big thanks to Erik Herman at ARB USA and Bryan McMeikan at Safari Snorkel for doing all the legwork.
From Bryan McMeikan at Safari Snorkel.
“The Air Ram is designed to face forwards. This is where it reaches optimal flow. Whilst facing forwards the airstream entering the front of the ram is forced to make a turn to enter the neck of the Snorkel body. When the air makes this turn, the heavy particles in the airstream are forced to the outside. These heavy particles, such as water and/or dirt, are forced against the outer edge of the air ram and then forced out of the raised slots on near the bottom of the ram. This process works very efficiently for water separation from the incoming airstream, and this is because water particles are much heavier than air.
With dust, the particles are not as heavy, so although this process works, it is not as efficient. So although the snorkel ram does separate some of the dust, it does not separate it all. If the concern for dust ingress is just vehicles passing in the opposite direction when driving on a trail, I would not bother turning the air ram to face backwards. If the vehicle is in a convoy situation where they are following another vehicle for an extended period in heavy dust, then it is advisable to turn the ram backwards, but drive at a slow speed.
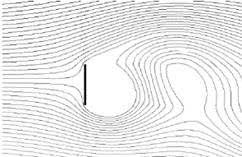
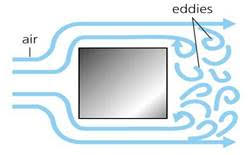
If the Air Ram is facing in a rearward direction there is interruption to the air flow. A basic airflow principle, the air that is trying to be drawn into the engine is from an interrupted source (see pictures below). So it is not clear airflow and lowers the volume of air that is available in the intake. There are a number of additional factors that have an effect on this airflow including vehicle speed, wind direction/speed, engine RPM etc. Because of all of these factors, Safari does not recommend driving the vehicle at more than 45mph if the Air ram is facing backwards. Just as a side note, driving in the conditions that would justify the air ram to be turned backwards – heavy dust, heavy snow – driving at more than 45mph is not advisable anyway!”
It should be pointed out that the 45mph is Safari Snorkel’s limit when the air ram is facing to the rear. When other manufactures specify a different limit you’ll want to follow their instructions.
Introduction North American Expeditions

Who We Are
North American Expeditions is a Service-Disabled Veteran-Owned Small Business (SDVOSB) that, along with internationally recognized training and recovery specialists, provide expert training in locations and times convenient to you. We are also coupled with equipment suppliers and fabricators in the Off Highway Vehicle (OHV) industry to meet your specific gear needs or vehicle requirements. Consult with us to meet your desired end-state for the missions you decide to embark upon.
MISSION
Provide adventure and travel enthusiasts the Overlanding and OHV knowledge, skills, and abilities to thrive as self-reliant travelers.
VISION
We offer professional 4WD training, personal consultation for overland vehicle-dependent travel, and adventure travel in some of the most rugged and scenic destinations in North America. We are networked with some of the leading 4WD trainers, adventure vehicle fabricators, backcountry explorers, and aftermarket vehicle equipment outfitters and manufacturers in the United States.
#Educate
Driving off-highway in rugged terrain is performance driving. We will help you develop the skills you need.
#Equip
We collaborate with off road outfitters and custom shops to provide vehicle packages to meet your needs.
#Explore
12 different trips. 12 different ways to experience North America like you never have before. And more…
Siping Cuts and The Water Between You and the Road

What is a siping cut?
Siping was patented for tire application in 1923 under the name of John F. Sipe*. There are two common versions of the stories of this invention’s creation. One involving Sipe working in a slaughterhouse and the other as a dock worker. Both involve slick floors and Sipe getting tired of slipping on them. Then finding out that cutting slits in the tread on the bottoms of his shoes provided better traction than uncut tread. If you think of the soles of deck shoes you’ll get the idea. But Sipe thought about tires, and it wasn’t very popular.
At first it was only applied to solid tires and solid tires have a relatively small contact patch. That limited the siping cut’s effectiveness. It first became popular in the United States in 1939 when the Inventor’s son, Harry E. Sipe, applied this technology to the new low-pressure balloon tires.
Okay. So how does it work? A little bit about the water between you and the road first.
The mechanics of a water film and tire interaction can be broken up into three zones on the tire’s contact patch. The leading edge zone, zone one, is a water wedge boundary caused by displacement inertia of the water film. Zone two is a mixed zone of the water wedge boundary and a water squeeze-film layer. Zone three is dominated by the squeeze-film layer. The size of these zones can vary in length depending on speed. At very high speeds zone one will cover the entire contact patch. Hydroplaning. As speed decreases you can have partial hydroplaning where part of the tire load is supported by the water wedge. At low speeds zone three will cover the entire contact patch. While zone one and two can be removed by reducing speed the amount of time it takes for a tire to squeeze through the water layer in zone three is independent of speed and depends entirely on the physical properties of the tire’s contact patch and the road’s surface.

Zone one to three progress from left to right. Each zone of the tire and water interaction is clearly visible.
So basically. The tire is squeezing out the water between it and the pavement and, if the vehicle is going fast enough, some of it gets pushed forward back in front of the tire only to be rolled over again. Building up a wedge that can lift part or all of the tire off the pavement, If it doesn’t get pushed out to the sides or forward it gets squeezed under the tire. This last bit is the squeeze-film layer. Regardless of how fast or slow you are going the water in this zone gets squeezed out at the same rate.
Channels and groves in the tire tread can address the tire’s efficiency in dispersing the water wedge formed. Rain sipe patterns address the squeeze-film layer by removing the water from between the contact patch and road surface. As the tire deforms to the road surface the sipes expand and form a vacuum. This pulls almost all of the remaining water film into the siping cuts allowing better contact.
A little side note here. Snow tires and snow sipes act differently. Most snow tires will use a tight zigzagging pattern for the siping cut with multiple cuts running in parallel and the tire material is designed to remain soft in cold temperatures. As the tire deforms under the vehicle’s weight and movement forces, these sipes expose the jagged edges and sides of the cuts greatly increasing the tread’s surface area and allow for better keying to the road’s surface.
Okay. So aftermarket siping. Should you? Depending on the tire most tire manufactures would probably say “no” to altering the computer-designed siping and tread patterns. The manufacturing process has gotten a lot more sophisticated and precise. Locking sipes that allow the tread block to flex in only specific ways and pumping sipes that are specifically designed with internal gaps to hold more water. Adding additional siping cuts can destroy this pattern and actually do more harm than good. If testing showed that adding more siping cuts would help they would add them.
* Pat number: US1452099A. Filed: Nov 2, 1920. Published: Apr 17, 1923.
Header photo courtesy of BFGoodrich